Docker上でApacheコンテナを作成しCGIのコンテンツを走らせるまで
Dockerの練習にApache2.4上でdifffを走らせてみました。
Dockerというより、sedの経験値が上昇した気がする。
参考サイト
http://docs.docker.com/linux/started/
https://hub.docker.com/_/httpd/
https://github.com/meso-cacase/difff
Docker インストール
公式サイトのインストール方法を参考に。
$ sudo apt-get update
$ sudo apt-get install wget
$ wget -qO- https://get.docker.com/ | sh

$ docker run hello-world


Hello from Docker.
This message shows that your installation appears to be working correctly.

To generate this message, Docker took the following steps:
 1. The Docker client contacted the Docker daemon.
 2. The Docker daemon pulled the "hello-world" image from the Docker Hub.
 3. The Docker daemon created a new container from that image which runs the
    executable that produces the output you are currently reading.
 4. The Docker daemon streamed that output to the Docker client, which sent it
    to your terminal.

To try something more ambitious, you can run an Ubuntu container with:
 $ docker run -it ubuntu bash

Share images, automate workflows, and more with a free Docker Hub account:
 https://hub.docker.com

For more examples and ideas, visit:
 https://docs.docker.com/userguide/
走った。
あとはDocker Hubから持ってきたり、Dockerfileをbuildするだけ
Apache2.4 のDockerfleをベースにdifffを走らせる
$ vi Dockerfle
Dockerfleを作成。ここにどのイメージから作るか、どういう設定をするか等を書いていく。
# Dockerfile
FROM httpd:2.4
Docker Hubからhttpd2.4の公式イメージを持ってくる。
この公式イメージはすでにアクセスログとエラーログが標準出力になっていたりするので便利。
このイメージの元となったDockerfileはこちら。
# Dockerfile
FROM httpd:2.4

RUN apt-get -y update && apt-get -y install wget unzip
RUN wget https://github.com/meso-cacase/difff/archive/ver6.0-stable.zip
RUN unzip ver6.0-stable
RUN rm -f /usr/local/apache2/htdocs/index.html
RUN mv difff-ver6.0-stable/* /usr/local/apache2/htdocs/
apt-getコマンドやらでインストールしてあるソフトウェアのバージョンをアップし、
difff6.0を /usr/local/apache2/htdocs/ に移動
# Dockerfile
FROM httpd:2.4

RUN apt-get -y update && apt-get -y install wget unzip
RUN wget https://github.com/meso-cacase/difff/archive/ver6.0-stable.zip
RUN unzip ver6.0-stable
RUN rm -f /usr/local/apache2/htdocs/index.html
RUN mv difff-ver6.0-stable/* /usr/local/apache2/htdocs/

RUN sed -ri 's/#LoadModule cgid_module/LoadModule cgid_module/g; \
             s/DirectoryIndex index.html/DirectoryIndex index.cgi/g; \
             s/Options Indexes FollowSymLinks/Options Indexes FollowSymLinks ExecCGI/g; \
             s/#AddHandler cgi-script .cgi/AddHandler cgi-script .pl .cgi/g' /usr/local/apache2/conf/httpd.conf
RUN sed -ri "s|'http://difff.jp/'|'./'|g" /usr/local/apache2/htdocs/difff.pl
Apache2.4 のバージョンはcgiがデフォルトでオフになっていたり、
ルートディレクトリではcgiの実行ができないので、その諸設定をsedで修正。
difffのプログラム内での変更箇所も修正。
これで、Dockerfileが作成できた。これをDockerfileというファイル名で保存、ビルドして実行すればdifffがDocker上で動くようになる。
buildして実行
Dockerfileがあるディレクトリで移動し次のコマンドを実行
$ docker build -t difff .
$ docker images

REPOSITORY                TAG                 IMAGE ID            CREATED             VIRTUAL SIZE
difff                     latest              82xx7fa066fc        23 hours ago        206.3 MB
difffのイメージが作成されているはず。
次のコマンドで外部に公開
docker run --name difff -p 80:80 -d difff
-p オプションで外部にポートを公開する。
-p 外部に対して開けるポート:docker内部のポートなので注意。
例えば8080ポートに対して開く場合なら次のようになる。
docker run --name difff -p 8080:80 -d difff
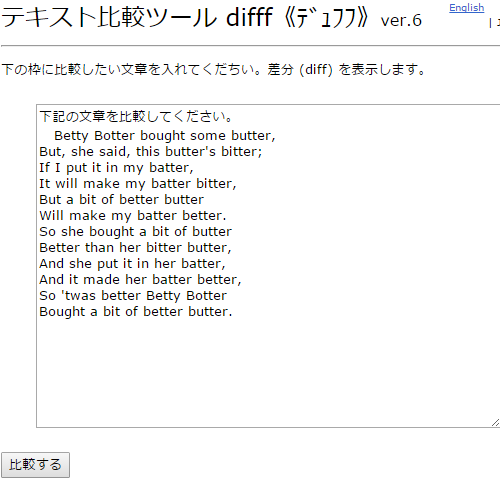
ということでできたのがこれ。

このままだとIPとかドメインとかは全く考えてないのでフロントにnginxなりhttpdなりでVHしたりして振り分けるといいと思います。